Things what I writ

I sometimes write nonsense about things to try and sound clever

I like big architecture

heathrow 3
heathrow 3 by Tim Caynes

its all very well sitting there in your office pointing your camera at yourself and then painting shadows and highlights all over your face, but sometimes you might need to get out into the real world and turn your camera around to look through it, rather than looking at it. and what better place to do that than in a place where you are surrounded by lots of shiny new architecture like the new terminal 5 building at Heathrow airport where there is the most shiniest and most enormous bits of architecture I’ve come across recently. I mean, I rather like big shiny bits of architecture with walls of glass and unfeasably large skeletons, but there are only so many times you can stand in front of the Forum in Norwich getting the reflection of St Peter Mancroft over someone from the BBC eating dough balls with a Chianti at lunchtime.

one of the reasons I like photographing big architecture, especially modern, Richard Rogers style architecture, is that it often lends itself very well to post-processing of the style you might inadvertently call post-modern-urban-apocalyptic-galvanised, or, um, shiny. and that’s the kind of post-processing I like to do, most often with my own face, which, in its own way, is a kind of post-modern apocalypse anyway and is often quite shiny, but in general, works better with loads of glass. and metal. so when I was lucky enough to be British Airways-bound for Colorado via terminal 5, for a user experience summit with a twist, I wasn’t going to miss the chance to fill up my memory card with geometric shapes and reflections the size of Norfolk. in fact, I got there over 3 hours early, which, after a 4 hours National Express coach ride on the 727 is the minimum recovery time before a 9 hour journey in economy, armed with 2 cameras, a home-made sandwich, and the sun even came out. a bit.

the nice thing about terminal 5, it seems, is that you can actually take a dslr out and point it at things without fear of incarceration. the most interesting shots were to found on the outside of the building, landside, so probably not too much to worry about, but I was also able to wander freely within the terminal after security, airside, taking really rather pointless photos of concrete and aircraft noses and the occasional departure board. the most interesting bit, however, was the largest escalator I have ever seen, which transported down to the transit to take you from terminal a to terminal b. this wasn’t just a large escalator, this was an escalator with its own vanishing point and although I was unsuccessful in getting a perspective view down from top to bottom, or from bottom to top, that was worth using, I did catch some of it in this rather nice overlap of escalators, elevators, staircases, suspended walkways and other shiny stuff, just before heading to the transit. you can just about make out the people crammed into the glass elevator, which, right after I took this photo, crashed through the roof and landed in a chocolate factory.

incidentally, although I had meant it to be the point of what I was writing but as usual lapsed into something completely different. I used a number of things to process this photo, but it was a combination of Topaz, Photomatix, Photoshop adjustment filters and a fair amount of painting things with a brush, which I really need a tablet to do properly, and not the kind of tablet that gets rid of the headache I’m giving myself.

hdr processing

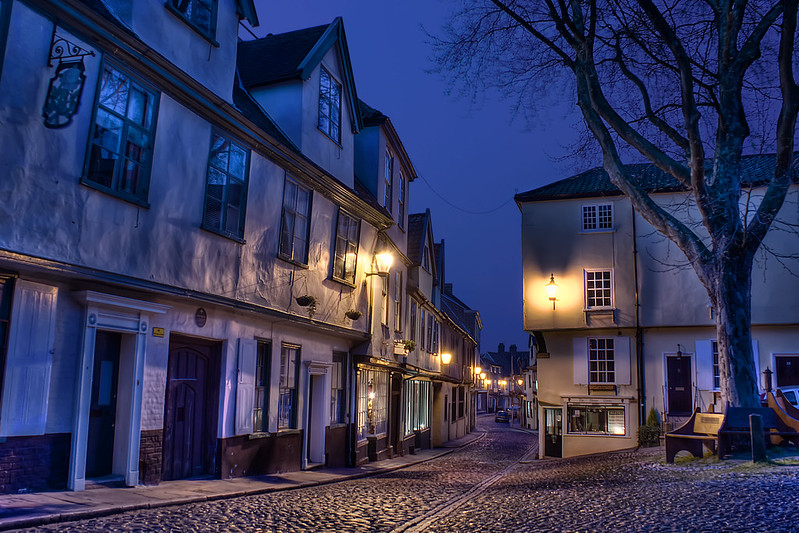
elm hill 2
elm hill 2 by Tim Caynes

since Corie has started going out at night and taking lots of groovy hdr I was reminded that I kind of like doing those but can’t remember how because last time I did it it took ages even though I wrote all the steps down on a post-it note that I immediately misplaced. but I had a rummage around in my drawer that has all my photographic stuff in it – it’s a pretty small drawer – and lo, the post-it note was stuck to the underside of a digital slr photography magazine from last year sometime in which I could learn all about taking polarized macro photos of wet cdroms arranged under a snooted soft umbrella box or something.

unfortunately, I still had no idea what I was talking about. it was full of things like ‘PS HDR x3+ (d,m,l)‘ and ‘PM EB (3 PS HDR)‘ and the rather ambitious one liner ‘PS HDR 1/2/3 PM HDR PM EB 1/2 RAW‘, complete with a big bracket underneath which suggested I should put it all somewhere and then do something with a smart object, which, these days, I just get slightly queasy just thinking about on my 5-year-old computer. so I decided I’d go out and get some new bracketed exposures and just try and follow my own instructions to see how it would go. to make it even more of a nightmare to process, I figured I may as well make it a night shot. with trees in. or something. I initially headed out to the roof of Anglia Square car park, because I like car parks, but I’d miscalculated the sunset and golden hour (not the one with Simon Bates), and so I was up there far too early and the thought of spending another hour up there just waiting for the sun to set behind a knackered lift shaft and a ropey old street lamp didn’t really fill me with inspiration.

after a couple of circular arguments I had with myself about the relative merits of Tombland and the cathedral I actually ended up in the irresistable scab of Norwich photographers that is Elm Hill. I mean, you don’t want to keep ending up there, but you can’t help picking at it now and then. If you’ve not taken at least 15 shots there over the years that you hide away in a hidden folder that you think you might process one day, then you get arrested. In this case, it was just about the right time of day to get a number of exposures with various shades of dark blue in the sky, but still get some appreciative cast from the pretty low-key street lighting. or that’s what I though. but I don’t really know what I’m talking about. nonetheless, I set up my Manfrotto, waited a few minutes while people rather annoyingly thought they might go about their business, and then took my 12 manually bracketed exposures from black to white, just as the wind picked up and threw the tree around like the wispy hair of a 42-year-old amateur photographer. the last exposure was about 30 seconds, during which at least 3 people stopped in their tracks as they came around the corner and saw me standing with my wireless remote looking, plainly, a bit mad in the dark. on the way home, I took about 59 pictures of the market at night for good measure, then I went home, ate a sandwich, watched the Champion’s League, the Bourne Identity and the 50 greatest 50 greatest celebrity cheese breakdown soap advert scary war film love scenes, and that was that.

a few days later, I actually kicked the computer into action, and tried to follow the scribbled workflow process, just to see if it would make any sense at all. it slowly came back to me and I remembered some of the things that I got caught out with before (don’t overprocess the HDR conversion, don’t auto-align in photoshop, don’t auto-align in photomatix, don’t try and do it with smart objects, etc.) which took a while to rectify, but on the whole, the scribbly wibbly workflow turned out to be alright. of course, there was mucho to do with blending, masking, opacity and highlight/shadow painting, and as it was a night photo, actually undoing most of the processing was the biggest challenge, but to get to the point where all the fancy automated processes had done as much as they were going to do, the workflow worked fine. so much so that I wrote it out all over again. but with boxes and arrows and things. on a computer. I think its called a flow diagram, but I largely made it up. if you want to see how little sense it makes when you first look at it, take a look for yourself, and, if you’ve got the tools, or at least some of them, you might want to try it out. I just want somebody to go through it so I can laugh at them later.

photoshop and lamps

96/365
96/365 by Tim Caynes

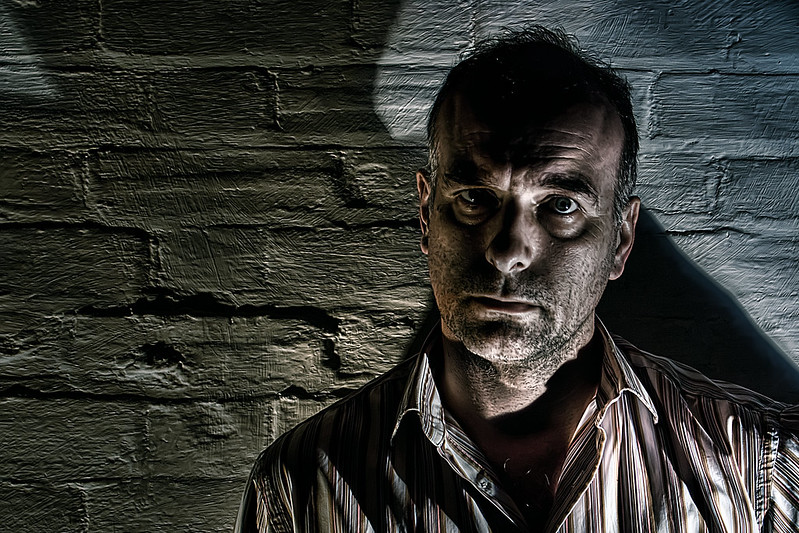
there’s nothing really more appropriate to fill 10 minutes of your day than to lurch down to the cellar, point a desk lamp at your face as take photos of it. such a vicarious lampist thrill is surely the antidote to getting up at 5 in the morning and trudging out to the Norfolk Broads to catch the first sunrise over a wind pump as you drop your Sigma 10-20mm into the mud and watch your Manfrotto slowly sinking out of sight as a large bird picks up your Lowepro and whisks it off to Narnia. not that I’ve done that. I’m too busy mucking about with R50 bulbs and miniature skateboards to do photography all proper-like.

so to the latest arms-length clip-light lunchtime abberation in my growing collection of things you can do with an arm and a clip light and a camera, which pretty much serves as a template for how I’m doing this nonsense, both in the photo capture and the post-processing. its pretty much as I’ve described in the other low-light post-processing entries in this blog and lo, its the same wall, the same lamps, the same camera, the same time of day, the same face, the same photoshop, the same everything really. even the layers in the photoshop files look pretty much the same, except, of course, you wouldn’t know that, other than taking my word for it.

except this time. I can’t frankly be summon the will to tell you how I did it even if you were remotely interested which you’re probably not although you’re reading this so you at least were foolish enough to follow the link that says’ read about this’, so I’ve uploaded the photoshop file for you to poke around in, I’ve labelled it and everything. honestly, it was quicker to upload the file than it is to write about it. you can probably copy and paste your own head into it or something. you might like to know that its over 200mb before you think about downloading it, if you were. perhaps you just did. I tried zipping it to make it smaller, but it made it bigger.

not even a banner graphic

Its photo, as in photos, and opacity, like the opacity of layers in photoshop. You see what I did there. I put them together to suggest a kind of theme for what this blog is about. I see you’re not convinced. An actual fact, photopacity.com was available and I’d run out of ideas for 2 word combinations that suggested a theme of photography, photoshop and disk space. Or something like that.

I’ll start by saying that I’ve never used the sponge or the thing that looks like a pin. Is that dodge? Or burn? I mean, I’ve dodged and burned I think, I’ve just not done it using those tools. Since I first started using photoshop at version 2, which was a glorious port to the Solaris operating system running on what was probably a Sun Sparcstation 1+ or something, I’ve been making it up as I go along. Before layers, you learned pretty quickly that if you didn’t save backup copies of each file every 10 minutes, you might as well just bang your head against a wall at the beginning, to save time later. With layers and layer masks you soon learned that, after peeling your eyes of the screen following a 4-hour hand-trace of a goldfish with a 13 pixel soft brush, all your hand-traced masks are rubbish. By the time I get to grips with CS4, I’ll have learned about 30% of what CS3 can do. Which is 50% of what CS1 could do. And about 300% of what photoshop 2 could do. I think that means I’m using about 10% of photoshop functionality, but, as will hopefully become clear as I blart these incomprehensible gobbets of technobile, I think that’s all I need.

As for digital photography, I can safely say I have almost completely no idea what I’m doing, but I know how to point a camera in the right direction. I sometime take the lens cap off etc…

stitch up

just when you think you couldn’t waste any more of your own time, you take a look back through your thousands of unused digital photos and come across at least 17 batches of shots that you thought one day you would turn into an exciting panorama, spending far too long with a photoshop file with 229 layers and a lifetime of airbrushing layer masks so that that tree on the right has branches that actually join together somehow. so how serendipitous that I should have come across a folder with not one, but two sets of photos that somehow I thought I could combine in an oh-so-clever way and travel back in time or something. I knew there was a photomerge in creative suite 3, I just hadn’t had time to play with it.

17 hours land 5 different attempts later and a number of lengthy intervals while I foolishly thought I might just rotate my 1.2GB photoshop image 1 degree counter clockwise, and I have a mashed up panorama. its not very good. I mean, when photomerge stitches everything together, it looks pretty nice and I thought it was very clever, but it was just a bit annoying. it didn’t do it exactly how I wanted it, and really it had a thankless task, as my camera is pretty bad and I’d deliberately left out a few connecting frames, just to see what would happen, so that I ended up trying to make perspective views of multiple perspective views which resulted in the centre of the image being about 1 pixel high and the edges about 10000, but you get the hang of it eventually – just get everything right first time.

I’m still working on the most enormous version of a flattened all-round view of the most monstrous building in norwich and I’ll continue to do that by hand, filling in the gaps with ford fiestas that miraculously appear from the car park next door or carefully aligned bushes to cover my mistakes. of which there are many. but its not like anyone looks at it anyway.

Archives
Categories

Share